
The Xatkit platform ecosystem is growing fast, and we will add 3 new platforms in the next release scheduled in a few days. However, we cannot create and maintain new platforms as fast as we would like to, and you may want to integrate third-party services in your bots that are not yet supported by Xatkit, such as Google Calendar, Trello, or even Spotify.
To tackle this issue we have created a new platform to interact with Zapier. Indeed, Zapier is an automation tool to facilitate the connection of applications together through a unified endpoint mechanism. Our Zapier platform takes advantage of it to trigger Zapier workflows (called Zaps) from Xatkit, and manipulate the Zap result if needed. Zapier provides more than 1500 app integrations, and our new platform makes them virtually accessible to every Xatkit bot!. Thanks to this integration you can now easily add a chatbot interface to any third-party application supported by Zapier.
In the following, we illustrate the capabilities of the Zapier platform through the SlackTrelloBot example, a chatbot that listens to Slack channels and automatically creates Trello cards from user inputs. The SlackTrelloBot can be used in private conversations as well as mentioned in any channel is installed in, and lets you create cards without losing focus on the ongoing conversation (we are actually using it in our own Xatkit Slack workspace 🙂 ) Note that you need a Zapier account to follow this tutorial, but all the Trello integration we use is available from Zapier’s free plan.
As usual, we will assume that your bot is defined in the SlackTrelloBot directory, and contains 3 files:
SlackTrelloBot-Lib.intent: the library of intents matched by the botSlackTrelloBot-Ex.execution: the execution models containing the conversation logicSlackTrelloBot.properties: the properties file holding credentials and deployment options
If you prefer to check the complete code while following the tutorial you can find it in our example repository on Github.
Slack configuration
The SlackTrelloBot is deployed on Slack, you can find the different steps required to create a Slack application in this article. Once your application is created, you can fill your SlackTrelloBot.properties file with the following information:
xatkit.slack.token = <Your Slack app token>

xatkit.slack.listen_mentions_on_group_channel = true
The xatkit.slack.token key corresponds to the token used by Xatkit to authenticate and receive/send messages from Slack. The xatkit.slack.listen_mentions_on_group_channel key is a recent addition to the Slack platform that customizes the behavior of the bot to make it listen only to explicit mentions when installed in group channel (using the @bot command), avoiding unwanted replies from the bot when it is not supposed to.
Setup Zapier
The SlackTrelloBot relies on the Zapier integration with Trello. To enable Trello card creation from Xatkit bots we need to setup a new Zap that will manage the card creation on behalf of Xatkit. To do so, open the Zapier dashboard, and click on Make a Zap!
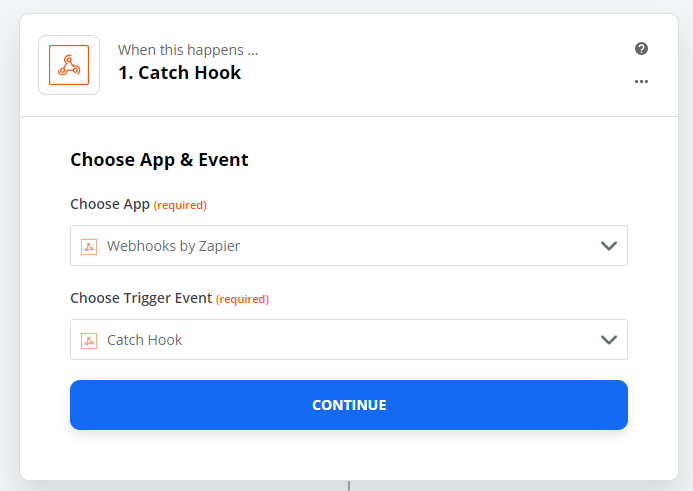
In the When this happens window select Webhook by Zapier, and select Catch Hook from the Choose Trigger Event dropdown menu. This allows to trigger your Zap from a REST request.
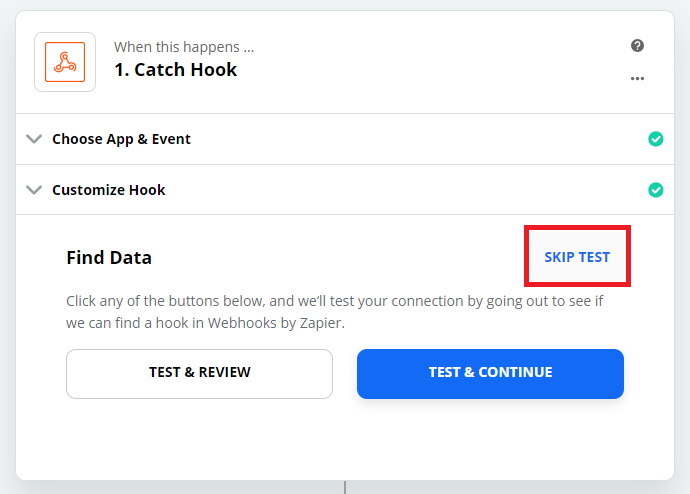
Click on Continue, and note the content of the Custom Webhook URL field, we will reuse it later to configure Xatkit, then click again on Continue. The last step allows to find some data from example REST requests, we don’t need it in this example, so you can simply click on Skip Test.
We now need to configure the action to perform once the Zap is triggered. In the Do this ... window select Trello, and select Create Card from the Choose Action Event dropdown menu. Zapier will then ask you to login with your Trello account in order to load your boards.
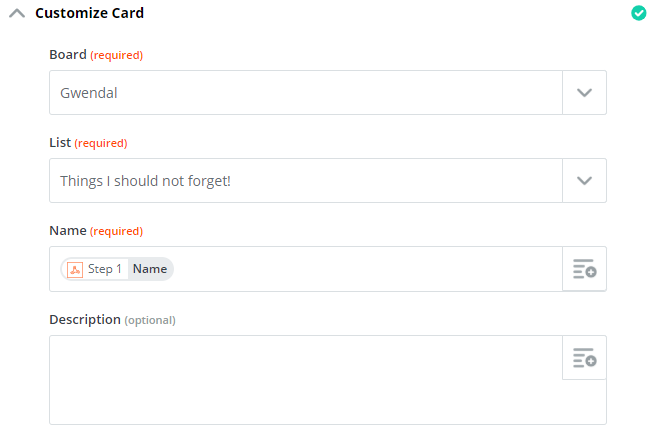
Navigate to the Customize Card tab, and fill the Board and List fields with the Trello board and list to add cards in. Fill the Name field with the following content: {{name}}, this is the Zapier way to specify that we want to access the name value from the received JSON payload (this value will be set from our execution model). You can leave the default values for the other fields. Once this is done you should have an action similar to the one shown below (note that Zapier formatted our {{name}} into a user-friendly representation):
Click on continue, and skip the Send Data test proposed at the end of the process. Congratulation, your Zap is now ready to go! Make sure that your Zap is turned on by checking it in your dashboard.
Define the intents and the execution model
We now have setup all the platforms and configured Xatkit to interact with them. To test our bot we now create a simple intent file containing a single intent:
Library SlackTrelloBotLibrary
  intent NewCard {
    inputs {
      "Create a card CardName"
      "Create a card named CardName"
      "Create a card with title CardName"
    }
    creates context Card {
      sets parameter name from fragment "CardName" (entity any)
    }
  }
Our execution file is also rather simple and contains a single rule that matches the NewCard intent and invoke the ZapierPlatform.PostAction action to trigger the defined Zap.
import library "SlackTrelloBot/SlackTrelloBot-Lib.xmi"
import platform "ZapierPlatform"
import platform "SlackPlatform"

use provider SlackPlatform.SlackIntentProvider

on intent NewCard do
  action ZapierPlatform.PostAction(zapierEndpoint: <Your Zapier Endpoint> , jsonBody: "{ 'name' : ' " + context(Card).get("name") + " '}")
  action SlackPlatform.Reply(message : "Done!")
Note that you need to set the value of the zapierEndpoint parameter with the Custom Webhook URL value noted previously (if you forgot it you can retrieve it by editing your Zap in the dashboard 😉 ). We chose to not include it in the configuration file to allow multiple Zapier endpoint calls from the same execution file.
Run your chatbot
Our SlackTrelloBot is now ready to be deployed! You can start it by running the following command:
cd $XATKIT/bin
./start-xatkit-windows.sh
If you don’t have a local installation of Xatkit you can check this article to install and setup Xatkit on your machine.
Note: this bot works with the latest snapshot version of Xatkit, you can check this article to setup the Xatkit Development Toolkit to use snapshot versions, or wait a couple of days to have the Zapier platform integrated into the official release 🙂
Test your chatbot
Open a direct message channel with the deployed bot and write the following message: Create a card Test, then check that a new card named Test has been created on the board and list specified in your Zap!
You can also invite your bot to a Slack channel and write the following message: @<Your Bot Name> Create a card Test, where <Your Bot Name> is the name of your bot. Note that the bot will not reply in a channel if you haven’t explicitly mentioned it (we forced this behavior with the xatkit.slack.listen_mentions_on_group_channels = true property in SlackTrelloBot.properties).
Conclusion
Our Zapier platform offers a brand new set of applications that can be used from Xatkit execution models. You can now benefit from the 1500+ integrations provided by Zapier to create more powerful and cross-platform bots than ever!.