Carrd is a freemium platform to build simple and fully responsive one-page sites for pretty much anything. One-page sites are an ideal solution to quickly have an online presence without having to invest all the time (and money) that a full site typically requires.
But of course, one-page sites also have limitations. For instance, you cannot include in the site all the information you would like (well, you can, but you should not, or you’ll end up with a never-ending page…) nor structure it via complex menus.
This is where chatbots come to the rescue. A chatbot is an ideal complement to one-page sites by providing a way to offer additional information and answer any question your visitors may have, while keeping the simplicity of your site design and structure (plus all the other benefits of chatbots!).
In this post, we show you how to add a Xatkit chatbot to your Carrd site.
Creating the bot of your dreams
Xatkit is an open source solution. Xatkit has been created to reduce boilerplate code, complex API understanding, and technical details to facilitate the definition and deployment of your bots. Xatkit helps you focus on what really matters: the conversation logic you want to embed in your chatbot.
Start here to learn how to create your own bot. You can also browse some simple chatbot examples or play with a more complex one showing Xatkit powering eCommerce sites.
Adding the bot your Carrd site
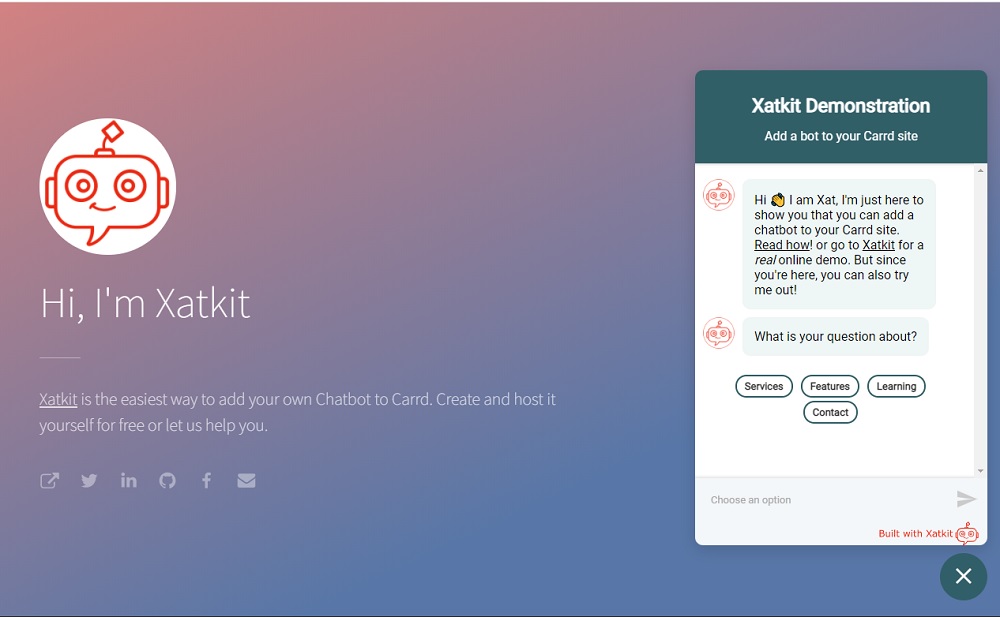
Once the bot is ready, you can now embed in your Carrd site a tiny piece of JavaScript and CSS required to render the bot widget on your site, as you can see in the featured image illustrating this post. To do so, you’ll need a Pro plan as the free one doesn’t allow embedding custom HTML.
We’ll add two embed elements of type code as we describe next.
Importing Xatkit’s CSS and JS files
The first one will import Xatkit’s js and css libraries. These files together with a description of all possible configuration options (e.g. to display the bot maximized or minimized, change the widget title,…) are available here.
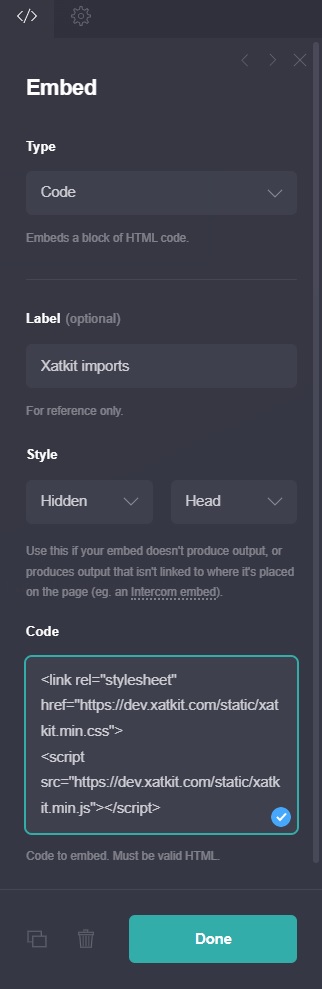
Note that the embed is configured to be inserted inside the Head tag of the page to make sure the libraries are available when called by the function rendering the widget.
Rendering the widget
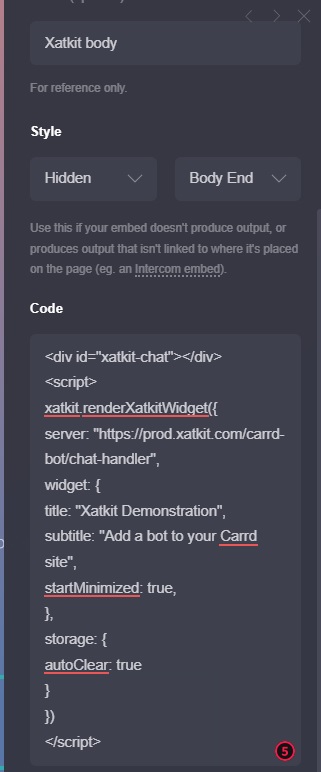
The actual rendering of the widget happens by calling the renderXatkitWidget method. Again, you can configure many of the aspects of this call but you can also just copy & paste the code below. Just make sure the server variable points to the URL where you have deployed the bot. E.g. in our sample bot the server URL would be https://prod.xatkit.com/carrd-bot/chat-handler.
Note: if you’re hosting your bot with us, then you can find the right script to copy in your Carrd embed by going to Install your bot -> Others in your Xatkit dashboard
This second embed element must be added to the Body of the page, as you can see in the configuration displayed in the above image.
Once the two embedding components are added, you should see something like this
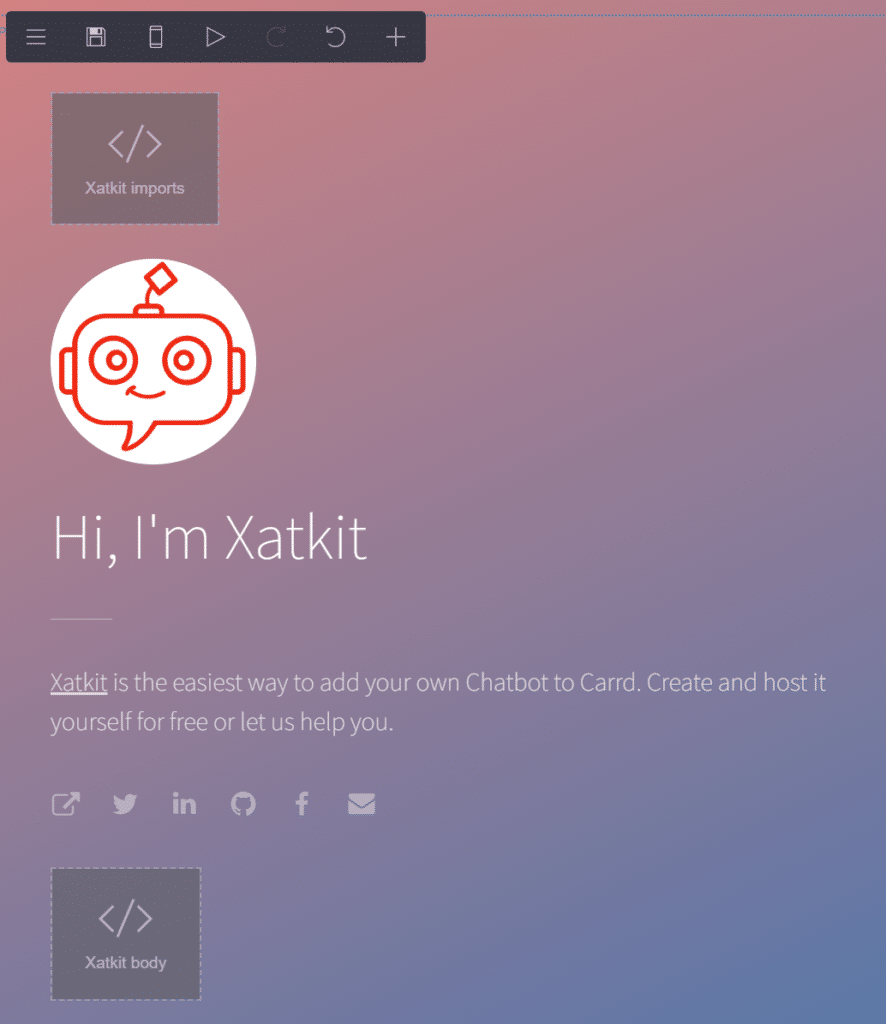
where the two previous embeds are displayed one in the head and the other in the body sections
And we’re done! At this point, you should see your Carrd chatbot working,
Of course, we’ll be happy to create a custom bot for you, including any of the powerful chatbot features Xatkit has to offer. But you can also try it yourself. If so, let us know what you’ve created!